Microscope Drawing Worksheet
If you're interested in improving your drawing skills or studying the intricate details of a microscope, this Microscope Drawing Worksheet is perfect for you. Designed for beginners and art enthusiasts alike, this worksheet will help you understand the structure and entity of a microscope while also honing your artistic abilities.
Table of Images 👆
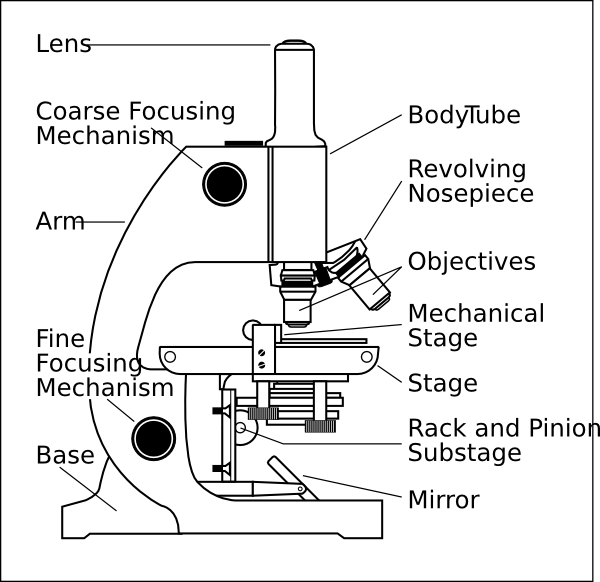
 Microscope Parts Labeled
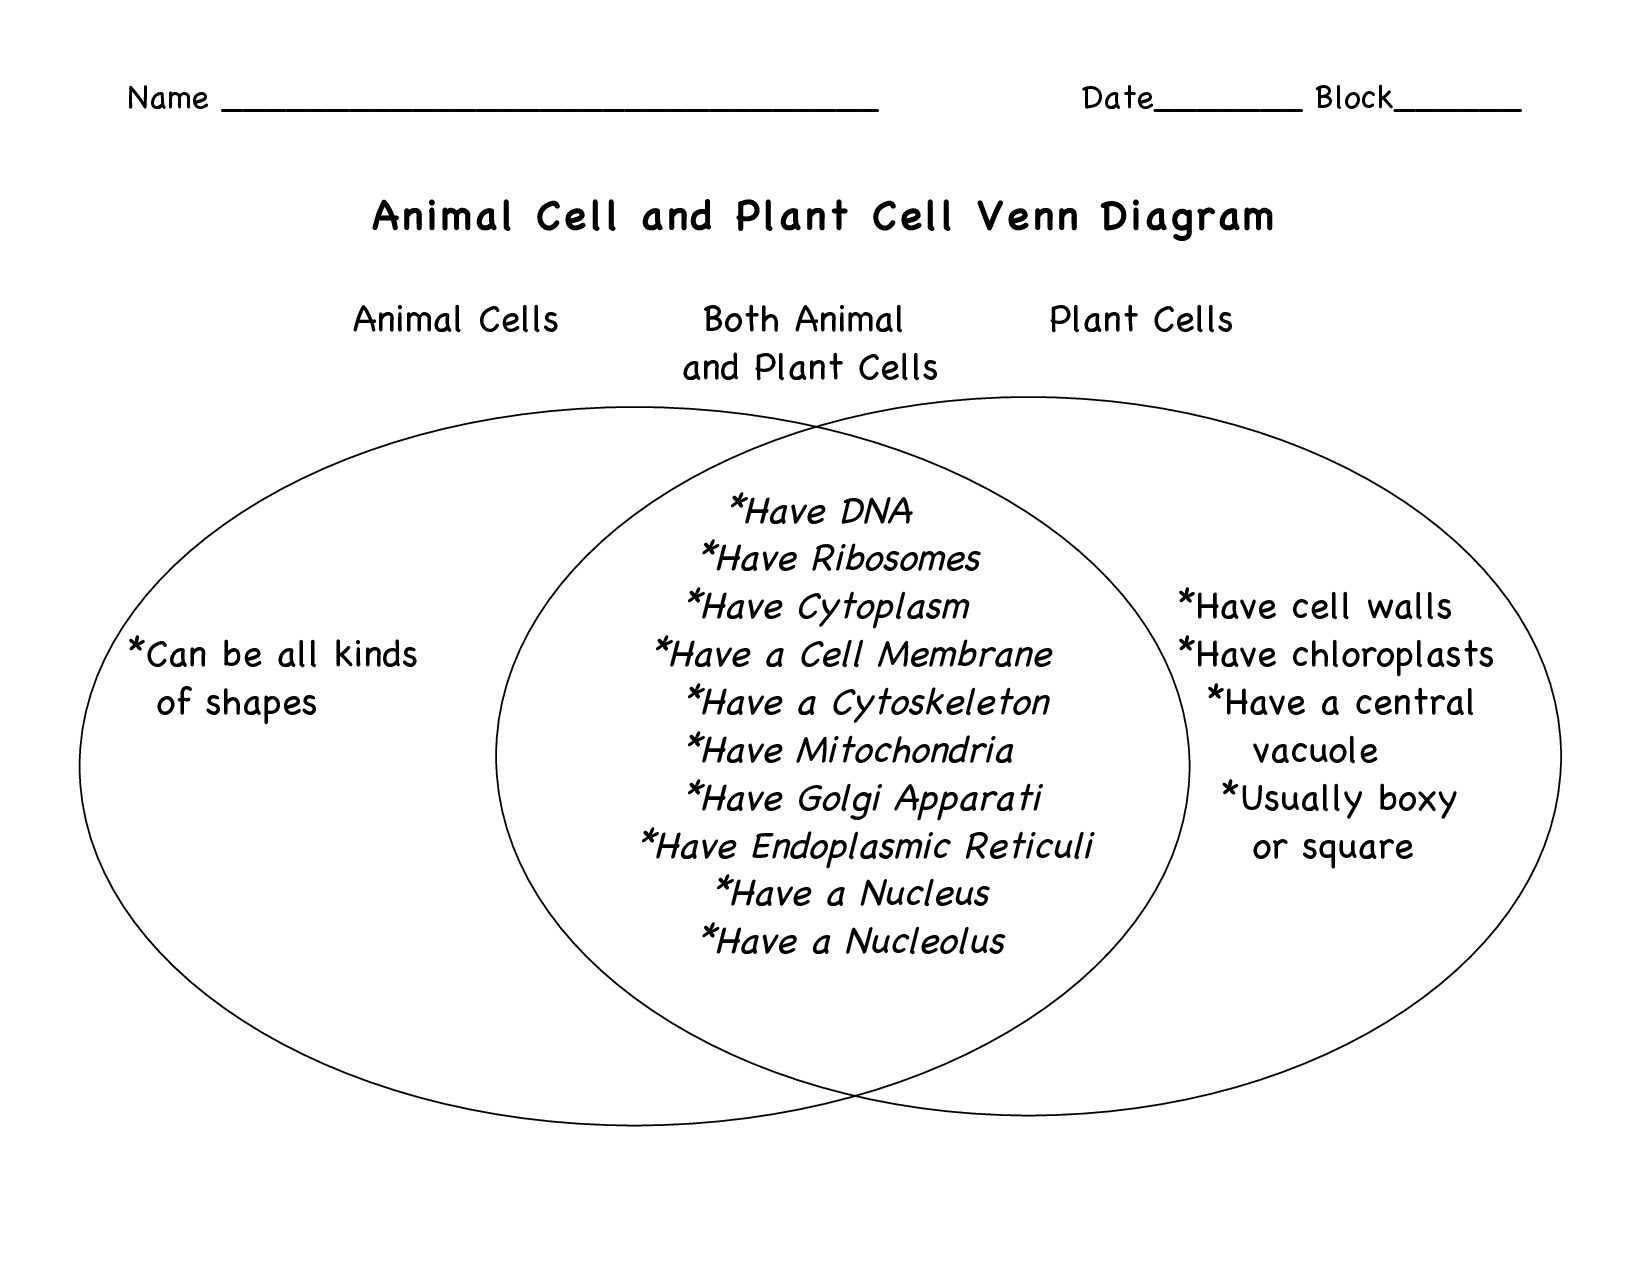
 Plant and Animal Cell Venn Diagram
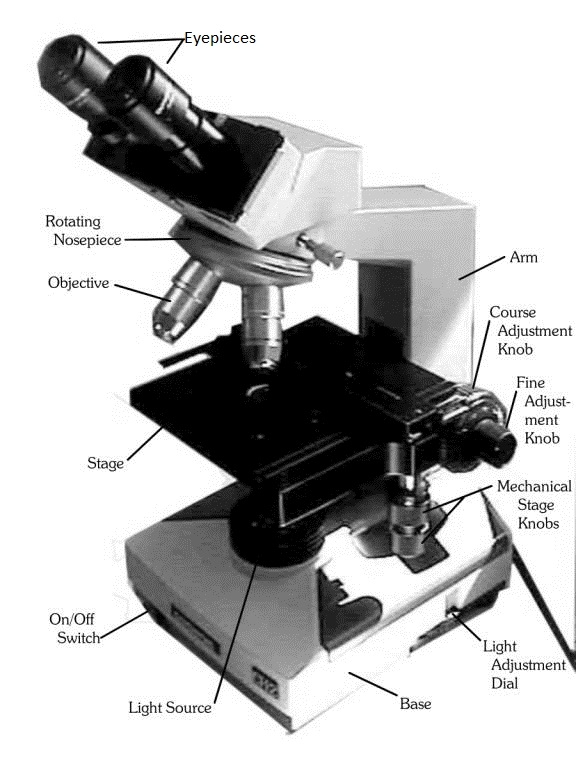
 Compound Binocular Light Microscope Labeled

 Skin Cross Section Diagram

 Interval Notation Worksheet
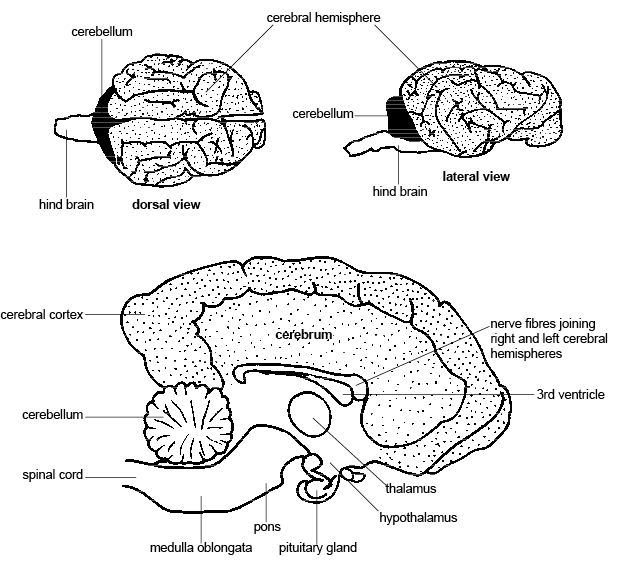
 Dog Brain Anatomy Diagram

 Cell Diagram Worksheet
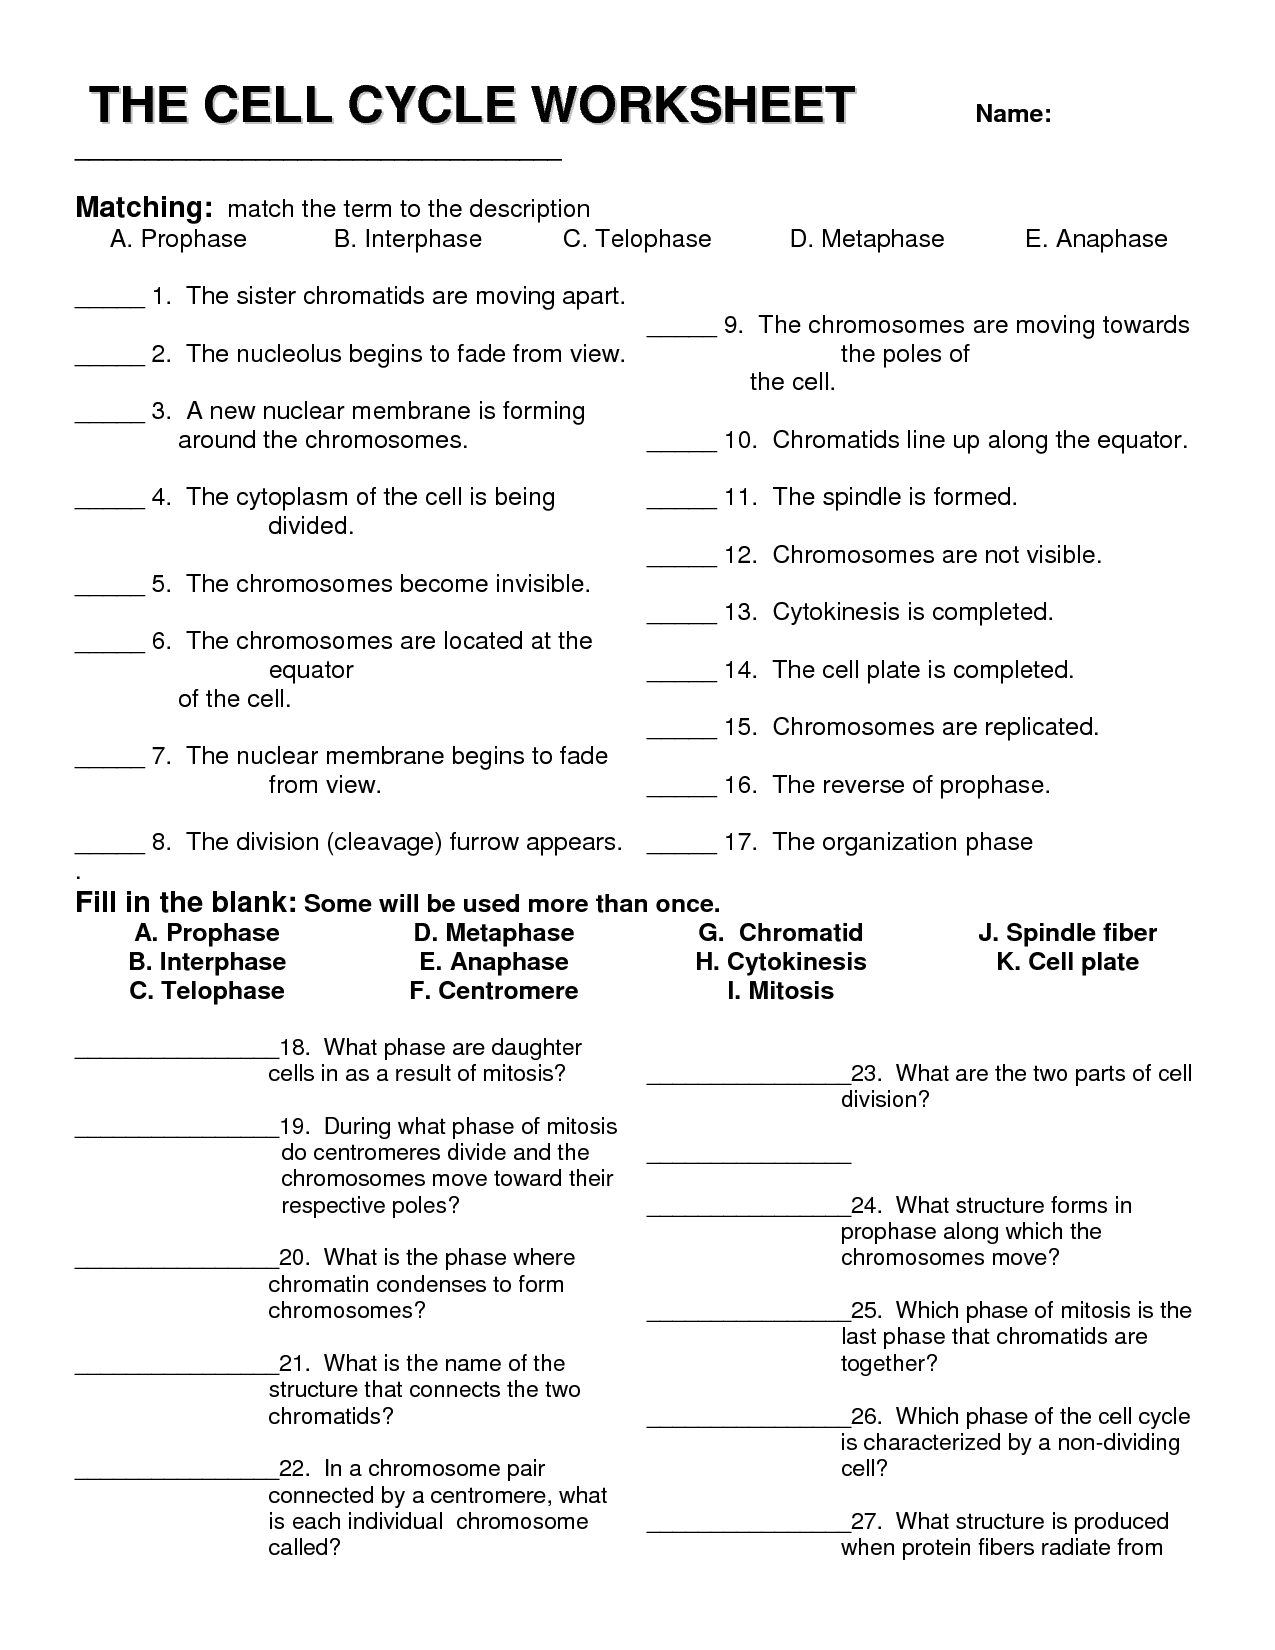
 Cell Cycle Worksheet Answer Key

 Human Skeleton Diagram without Labels
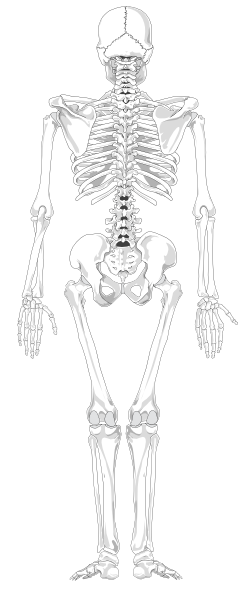
 Human Skeleton Diagram without Labels
More Other Worksheets
Kindergarten Worksheet My RoomSpanish Verb Worksheets
Cooking Vocabulary Worksheet
DNA Code Worksheet
Meiosis Worksheet Answer Key
Art Handouts and Worksheets
7 Elements of Art Worksheets
All Amendment Worksheet
Symmetry Art Worksheets
Daily Meal Planning Worksheet
What materials are needed for microscope drawing?
To draw images viewed through a microscope, you will need a microscope, glass slides, cover slips, a light source, a pencil or fine-tipped pen, and paper. Optionally, you may also use a camera attachment for the microscope to capture and draw from images. Additionally, having a steady hand and attention to detail is crucial for accurately representing the microscopic structures.
How do you properly adjust the microscope for drawing?
To properly adjust the microscope for drawing, first focus the specimen using the coarse and fine focus knobs until the image is clear. Then adjust the lighting to ensure the specimen is well illuminated. Next, center the specimen in the field of view and adjust the magnification to the desired level. Finally, use the mechanical stage controls to move the specimen into the desired position for drawing, making sure it is in focus throughout.
What is the purpose of using a light source in microscope drawing?
The purpose of using a light source in microscope drawing is to illuminate the specimen being observed. This helps to create contrast and visibility of the details within the specimen, enabling the artist to accurately depict the characteristics and structure of the specimen in their drawing.
How do you accurately measure and scale your drawings?
To accurately measure and scale your drawings, you can use a ruler or a measuring tape to determine the dimensions of different parts of your drawing. You can then use a scaling factor to proportionally resize your drawing according to your desired scale. This can be done by multiplying or dividing the actual measurements by the scaling factor. Using a grid system or a specialized scaling tool can also help in accurately measuring and scaling your drawings. Practice and precision are key in ensuring that your drawings are scaled accurately.
What are some common drawing techniques used in microscope drawing?
Some common drawing techniques used in microscope drawing include using a camera lucida to project the image onto paper for tracing, creating detailed line drawings by observing magnified images through the microscope and accurately reproducing their features, shading techniques to capture subtle variations in tone and texture, and the use of grid systems to help scale the drawing accurately and maintain proportion. These techniques are essential for accurately representing the detailed structures observed through a microscope.
What are the key elements to include in a microscope drawing?
When drawing a microscope, key elements to include are the eyepiece, objective lens, stage, base, arm, focus knobs, light source, and the specimen being viewed. Additionally, details such as magnification level, scale bar, and any other specific features of the microscope should also be incorporated for accuracy and clarity.
How do you indicate depth and three-dimensional structure in microscope drawings?
To indicate depth and three-dimensional structure in microscope drawings, shading and hatching techniques can be used to create the illusion of shadows and highlights. By strategically applying darker tones to areas that are meant to appear farther away or under an object, and lighter tones to areas that are closer or protruding, a sense of depth and three-dimensionality can be achieved. Additionally, using techniques such as stippling or cross-hatching can help convey texture and create a more realistic representation of the specimen being observed under the microscope.
How do you accurately represent colors in microscope drawings?
To accurately represent colors in microscope drawings, it is important to use color calibration tools to ensure accurate color reproduction. It is also advisable to use a standardized color palette to maintain consistency and to consider factors like lighting conditions and background colors that may affect the perception of colors. Additionally, adjusting the white balance and contrast levels can help to enhance color accuracy in microscope drawings.
What are some tips for improving the clarity and accuracy of microscope drawings?
To improve the clarity and accuracy of microscope drawings, ensure the microscope and slides are clean, use the appropriate magnification and lighting for the specimen, practice hand stability, use a ruler or grid for size reference, label and annotate the drawing clearly, and make sure to accurately represent the shapes, patterns, and structures observed under the microscope. Additionally, taking time to observe and understand the specimen before drawing can also enhance the overall quality of the microscope drawing.
How can microscope drawing skills be applied in scientific research or education?
Microscope drawing skills can be applied in scientific research by allowing researchers to accurately record and communicate the microscopic structures and details observed during their studies. These drawings can help in the documentation of findings, sharing information with colleagues, and even in publishing research papers. In education, developing microscope drawing skills can enhance students' understanding of biological structures and processes, as they learn to observe, interpret, and draw what they see under the microscope. This can deepen their scientific knowledge and improve their ability to communicate complex concepts visually.


Have something to share?
Who is Worksheeto?
At Worksheeto, we are committed to delivering an extensive and varied portfolio of superior quality worksheets, designed to address the educational demands of students, educators, and parents.


Comments